Showing posts with label English Version. Show all posts

Thursday, February 15, 2018

Installing Dspace 5.7 On Ubuntu 16.04.3 LTS

Installing Dspace 5.7 On Ubuntu 16.04.3 LTS

Install Openssh
sudo apt-get install openssh-server
sudo service ssh status


1. sudo apt-get install openjdk-8-jdk

if you found this problem
...E:Could not get lock /var/lib/dpkg/lock’

please try this steps to fix it
a. ps aux | grep -i apt
b. sudo kill -9 processid   (look at sudo apt update)
c. Then kill all process about '..apt..'

or more details
How to Fix 'E:Could not get lock /var/lib/dpkg/lock’ Error in Ubuntu
Ref: https://itsfoss.com/could-not-get-lock-error/


2. set JAVA_HOME
sudo vi ~/.bashrc  or 
sudo nano ~/.bashrc

[add the next two lines below]
  export JAVA_HOME=/usr/lib/jvm/java-1.8.0-openjdk-amd64
  export PATH=$PATH:$JAVA_HOME

3. Install maven
sudo apt-get install maven

4. Install postgresql
sudo apt-get install postgresql

5. Download tomcat
wget https://archive.apache.org/dist/tomcat/tomcat-8/v8.5.24/bin/apache-tomcat-8.5.24.tar.gz 

6. Extracting tomcat
tar -xvzf apache-tomcat-8.5.24.tar.gz

7. Changing to directory /opt
sudo mv apache-tomcat-8.5.24 /opt

8. Change directory name to 'tomcat'
sudo mv /opt/apache-tomcat-8.5.24 /opt/tomcat

9. Add group name of 'tomcat'
sudo groupadd tomcat

10. Increase user name 'tomcat'
sudo useradd -s /bin/false -g tomcat -d /opt/tomcat tomcat
  * -s /bin/false ==> set shell to be 'false' to prevent using 'tomcat' login name
  * -g tomcat ==> set this user name to be group of 'tomcat'
  * -d /opt/tomcat ==> set home directory to be '/opt/tomcat'

11. Changing group owner of path '/opt/tomcat' to be group of 'tomcat'
sudo chgrp -R tomcat /opt/tomcat/

12. Setting group owner to be read and execute path of '/opt/tomcat/conf '
(&& is use for running with more than one command at the same time)
sudo chmod -R g+r /opt/tomcat/conf && sudo chmod g+x /opt/tomcat/conf

13. Changing user owner path of webapps/ work/ temp/ logs/ to be user of tomcat
cd /opt/tomcat
sudo chown -R tomcat webapps/ work/ temp/ logs/

14. Creating service name 'tomcat'
sudo vi /etc/systemd/system/tomcat.service or
sudo nano /etc/systemd/system/tomcat.service

Add some lines below into 'tomcat.service'

  [Unit]
  Description=Apache Tomcat Web Application Container
  After=network.target

  [Service]
  Type=forking

  Environment=JAVA_HOME=/usr/lib/jvm/java-1.8.0-openjdk-amd64/jre
  Environment=CATALINA_PID=/opt/tomcat/temp/tomcat.pid
  Environment=CATALINA_HOME=/opt/tomcat
  Environment=CATALINA_BASE=/opt/tomcat
  Environment='CATALINA_OPTS=-Xms512M -Xmx1024M -server -XX:+UseParallelGC'
  Environment='JAVA_OPTS=-Djava.awt.headless=true -Djava.security.egd=file:/dev/./urandom'

  ExecStart=/opt/tomcat/bin/startup.sh
  ExecStop=/opt/tomcat/bin/shutdown.sh

  User=tomcat
  Group=tomcat
  UMask=0007
  RestartSec=10
  Restart=always

  [Install]
  WantedBy=multi-user.target

15.Reloading systemd daemon
  sudo systemctl daemon-reload

16.starting tomcat service and check the working status
  sudo systemctl start tomcat
  sudo systemctl status tomcat

17.Let's service tomcat always start up after restarting
  sudo systemctl enable tomcat

18.To be config tomcat (For Thai language)
sudo /opt/tomcat/conf/server.xml   or
sudo nano /opt/tomcat/conf/server.xml

  by adding property -> URIEncoding="UTF-8" to tag Connector

Then it became

<Connector port="8080" protocol="HTTP/1.1"
               connectionTimeout="20000"
               redirectPort="8443" URIEncoding="UTF-8"/>


19.Setting authentication of postgresql to be 'trust' for allowing to create database to 'dspace'
sudo vi /etc/postgresql/9.5/main/pg_hba.conf    or
sudo nano /etc/postgresql/9.5/main/pg_hba.conf

by changing the line below
local      all     postgres     peer
..and change to be..
local      all     postgres     trust

Then restart service postgresql with command 'sudo service postgresql restart'

20.download DSpace Installer with command
wget https://github.com/DSpace/DSpace/releases/download/dspace-5.7/dspace-5.7-release.zip

21. Copying DSpace Installer to directory name '/srv'
sudo cp dspace-5.7-release.zip /srv

22. Unzip Dspace Installer
cd /srv
sudo unzip /srv/dspace-5.7-release.zip
  * Requirement to install unzip package by using command 'sudo apt-get install zip'

23. Create user name is 'dspace'
sudo useradd -m dspace

24. Next, create database user
sudo su - postgres

createuser --username=postgres --no-superuser --pwprompt dspace
(type password 'dspace' )

  * --username=postgres ==> Login user name for logging into database to create new database user
  * --no-superuser ==> Setting new created user without 'superuser'
  * --pwprompt ==> Setting new password of user
  * dspace ==> Name of user will be creating


25.Create new Database name is 'dspace' by using 'postgres' user
and assign owner to user 'dspace'
sudo su - postgres

createdb --username=postgres --owner=dspace --encoding=UNICODE dspace

  * --username=postgres ==> Login user name for logging into database to create new database name
  * --owner=dspace ==> Setting database owner
  * --encoding=UNICODE ==> Setting encoding to be UNICODE
  * dspace ==> Name of database will be creating

26. Creating folder name 'dspace' in directory '/srv'
  sudo mkdir /srv/dspace

27. Changing owner of folder '/srv/dspace' to be dspace user
  sudo chown dspace /srv/dspace

28. Changing configuration in 'build.properties' of installer
sudo vi /srv/dspace-5.7-release/build.properties  or
sudo nano /srv/dspace-5.7-release/build.properties

 [Changing some lines below]

dspace.install.dir = /srv/dspace
dspace.ui = jspui
dspace.name = Name of Institutional Repository
db.url=jdbc:postgresql://localhost:5432/dspace
db.username=user1
db.password=user1
mail.server = smtp.example.com
mail.server.username=
mail.server.password=
mail.from.address = dspace-noreply@myu.edu
mail.feedback.recipient = dspace-help@myu.edu
mail.admin = dspace-help@myu.edu
handle.canonical.prefix = ${dspace.url}/handle/
handle.prefix = 123456789

29. To build DSpace Installer
cd /srv/dspace-5.7-release
mvn package
  *Wating for 20-40 Minutes (Based on speed of each internet networking)

30.Installing DSpace
cd /srv/dspace-5.7-release/dspace/target/dspace-installer
ant fresh_install

31. Setting user for managing 'tomcat' through UI
sudo vi /opt/tomcat/conf/tomcat-users.xml     or
sudo nano /opt/tomcat/conf/tomcat-users.xml

under tag of 'tomcat-users' add below message to the last line
so it will be
.........
<user username="admin" password="xxxxx" roles="manager-gui,admin-gui"/>
</tomcat-users>

32.To allow tomcat from any client can be remoting
Edit at the directory of    ....../manager/......
sudo vi /opt/tomcat/webapps/manager/META-INF/context.xml    or
sudo nano /opt/tomcat/webapps/manager/META-INF/context.xml

and   Edit at  the directory of    ....../host-manager/......

sudo vi /opt/tomcat/webapps/host-manager/META-INF/context.xml   or
sudo nano /opt/tomcat/webapps/host-manager/META-INF/context.xml

comment or remark the next line below of both file the above
so it will change from

<Valve className="org.apache.catalina.valves.RemoteAddrValve"
         allow="127\.\d+\.\d+\.\d+|::1|0:0:0:0:0:0:0:1" />

to be

  <!-- <Valve className="org.apache.catalina.valves.RemoteAddrValve"
         allow="127\.\d+\.\d+\.\d+|::1|0:0:0:0:0:0:0:1" />  -->


33. Then restart service tomcat with command 'sudo systemctl restart tomcat'

34.Creating web app. through UI by logging into  'http://[host]:8080/manager'
example: 
http://dspaceweb.com:8080/manager    or
http://9.9.9.9:8080/manager
(if found error  403 Access Denied, please go back to check no.32 again !!)

  Context Path (required) ==> select path on web site such as: /solr
  WAR or Directory URL ==> path of project such as: /srv/dspace/webapps/solr

35. Otherwise, creating web app. into '/opt/tomcat/conf/server.xml'
sudo nano /opt/tomcat/conf/server.xml

by adding next line below
<Context path="" docBase=""></Context>     within tag Host  </Host>  !!
For example,
<Context path="/jspui" docBase="/srv/dspace/webapps/jspui"></Context>
<Context path="/oai" docBase="/srv/dspace/webapps/oai"></Context>
<Context path="/rdf" docBase="/srv/dspace/webapps/rdf"></Context>
<Context path="/rest" docBase="/srv/dspace/webapps/rest"></Context>
<Context path="/solr" docBase="/srv/dspace/webapps/solr"></Context>
<Context path="/sword" docBase="/srv/dspace/webapps/sword"></Context>
<Context path="/sword2" docBase="/srv/dspace/webapps/sword2"></Context>
<Context path="/xmlui" docBase="/srv/dspace/webapps/xmlui"></Context>

36. Creating Administrator account to manage Dspace system
/srv/dspace/bin/dspace create-administrator

37. Opening REST API Service
 by setting web app point to '/srv/dspace/webapps/rest'
So, it should be
<Context path="/rest" docBase="/srv/dspace/webapps/rest"></Context>

  * In case of using REST API with common http,
it need to be comment out in '/srv/dspace/webapps/rest/WEB-INF/web.xml'
nano /srv/dspace/webapps/rest/WEB-INF/web.xml

  * by comment out at '<security-constraint>'
change from
<security-constraint>  .......................................
........................................................................
</security-constraint>
to be
<!-- <security-constraint>  .......................................
........................................................................
</security-constraint>  -->


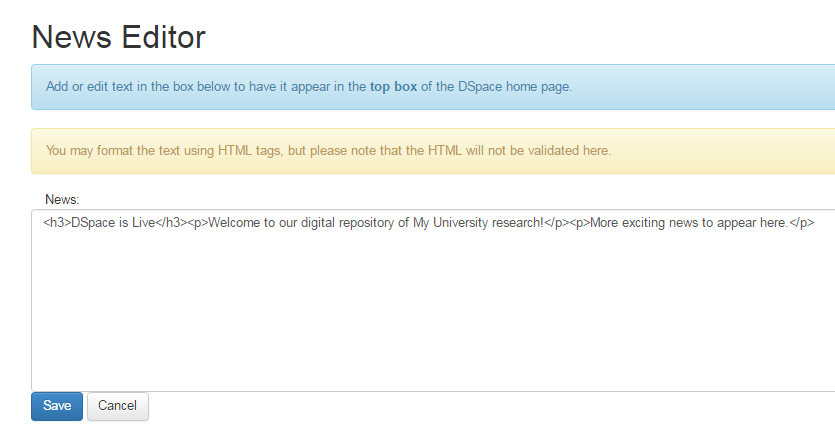
38. Changing jsp file
  * For any changed of 'home.jsp', you need to be copy 'home.jsp' into folder '/srv/dspace-5.7-release/dspace/modules/jspui/src/main/webapp'
  * Then run command 'mvn package' in path of /srv/dspace-5.7-release/dspace
  *and next run command 'ant -Dconfig=/srv/dspace/config/dspace.cfg'
in the directory of '/srv/dspace-5.7-release/dspace/target/dspace-installer'

  * Then restart service tomcat with command 'sudo systemctl restart tomcat'

39.  Before to be continue the next step, please try to do backup /ROOT in
/opt/tomcat/webapps  by using this command

sudo cp -avr /opt/tomcat/webapps/ROOT /opt/tomcat/webapps/ROOT-backup

Next, In case of using jspui, you need to be copy file from directory '/srv/dspace/webapps/jspui'
to replace into '/opt/tomcat/webapps/ROOT'
by using this command

cp -avr /srv/dspace/webapps/jspui/* /opt/tomcat/webapps/ROOT
chown -R tomcat:tomcat /opt/tomcat/webapps/ROOT


and for solr,
need to be copy file from directory '/srv/dspace/webapps/solr' to replace into
/opt/tomcat/webapps/solr

Thursday, June 1, 2017

Dspace 6 Customization For Windows 7 - 64 bit

Customizing the JSPUI pages


For the earlier post about Dspace 6 Installation on Windows 7 - 64 bit , 
after finished DSpace version 6 installation, you should see the screen of webpage as the picture below which can be customized upon your purpose by default is 'JSPUI template'.

The basically for testing layout customization , please open the directory

c:\apache-tomcat-7.0.69\webapps\ROOT\layout

(For this example, I'd changed directory's name from 'jspui' to 'ROOT')


The picture below is the default screen of dspace homepage without any customization.


*********************************************************************************************************

Example 1 :   Hidden or Replace 'DSpace JSPUI description' on header


Instructions:
1.  Open filename 'header-default.jsp' in  c:\apache-tomcat-7.0.69\webapps\ROOT\layout\
with any text editor (such as: Notepad++ / Editplus etc. )
2.  If you'd like to hidden, take a look at line no. about  135  and remark on two lines as below and save file.

    but if you'd like to replace anything, could replace here without comment.
3. Go back to your dspace homepage on web browser and try to refresh your screen by press F5 on keyboard and get the result.

*********************************************************************************************************
Example 2 :   Hidden or Replace 'DSpace JSPUI  Logo' on header


Instructions:
1.  Open filename 'header-default.jsp' in  c:\apache-tomcat-7.0.69\webapps\ROOT\layout\
with any text editor (such as: Notepad++ / Editplus etc. )
2.  If you'd like to hidden, take a look at line no. about  138  and remark on three lines as below and save file.

 
    but if you'd like to replace by another logo, could replace here without comment.

3. Go back to your dspace homepage on web browser and try to refresh your screen by press F5 on keyboard and get the result.

*********************************************************************************************************
Example 3 :   Changing the 'DSpace Name' at Green Bar


Instructions: 
       The default of dspace name at green bar is 'DSpace at My University' but if you'd like to change to another name please follow these steps:
1.  Open 'dspace.cfg' in directory 'c:\dspace\config\'  and change configuration at line no. about 47 to the new name then save and close text editor.
2.  Go back to your dspace homepage on web browser and try to refresh your screen by press F5 on keyboard and get the result.
(Tips! For Windows, after customized the configuration, it's not necessary to restart apache tomcat service but Linux must be)

*********************************************************************************************************
Example 4 :   Changing the message at  'DSpace is Live..'  area


Instructions: 
       If you'd like to change messages at box area of 'DSpace is Live...' please follow these steps::
1.  On the top-right  of the screen, click at menu 'Sign on to: '  and click 'My DSpace'


2.  Please login with an E-mail Address: and Password: from creating Administrator account for DSpace since the step of  Install Dspace 6 on Windows 7 - 64 bit


3.  Click at E-mail name on the top-right of screen and click Administer


4.  Click at menu 'General Settings' and click 'Edit News'


5. click at 'Top News' then click 'Edit' button


6. You can change any messages at 'News' box , it's better to have knowledge about html language for customizing. After finished, then click  Save


*********************************************************************************************************


Keywords:  dspace 6 customization, JSPUI Configuration and Customization

Tuesday, May 30, 2017

Dspace 6 Installation on Windows 7 - 64 bit

-   Should have basic knowledge with Windows 7 - 64 bit
 -  Be careful about name and space in each command 

1.      Prepare necessary files for installation by downloading from website as follow:

2.      Start to install by extracting all .zip file 
into drive c:\   the result  in c:\ directory will have
c:\apache-ant-1.8.0
c:\apache-maven-3.1.0
c:\apache-tomcat-7.0.69
c:\dspace-6.0-src-release


3. Then install java  'jdk-7u79-windows-x64.exe'  by right click on mouse and choose  'Run as administrator'


then click Next to install


After finished install click Close button


4. Then install database program by double click at filename   'postgresql-9.5.2-1-windows.exe'


Click Next to start the installation


Program will display the default installation Directory (use default) then click Next


Then display the Data Directory  (use default) and click Next


Then type password for database superuser (postgres), please remember or take note 
for your password and click Next


Then select port for connection to database (use default) port no. 5432 and click Next


Then choose Locale according to your country and click Next


Then click Next  to start installation


Wait for few seconds


Finally of PostgreSQL installation,   uncheck  'Stack Builder...' as the picture below and click Finish


5.      Next steps is setting  Environment Variables for program
by click at Windows Start button and right click on Computer -> Properties


click at Advanced system settings


Click at Environment Variables.. button


At System variables panel click select Path  and click Edit... button


Type semicolon ( ; )   symbol  to separate the directory name for different program
as the picture below  for example:
;c:\apache-ant-1.8.0\bin


then following by next directory -> ;c:\apache-maven-3.1.0\bin


then following by  -->  ;c:\Program Files\Java\jdk1.7.0_79\bin


then following by  -->  ;c:\apache-tomcat-7.0.69\bin


then following by  -->  ;c:\Program Files (x86)\PostgreSQL\9.5\bin
and click OK to finish add Variable value: of directory name


At 'User variables for Administrator' panel click New... button


At Variable name: type 'JAVA_HOME' and
Variable value: type 'c:\Program Files\Java\jdk1.7.0_79'
and click OK


At Variable name: type 'ANT_HOME' and
Variable value: type 'c:\apache-ant-1.8.0'
and click OK


At Variable name: type 'CATALINA_HOME' and
Variable value: type 'c:\apache-tomcat-7.0.69'
and click OK


Finally, for setting 'Environment Variables' click OK


Then click OK again


6. After finished setting 'Environment Variables'  then run test command on 
windows command panel  or run 'cmd.exe'


type command ' java -version' , for correct setting it will show java version
then following by 'ant -version'


7. Next step, create database names and roles through pgAdmin III program
by opening it as the picture below


Right click at PostgreSQL 9.5 (x86) (localhost:5432) name and click Connect


Then type password for user postgres (as setting on the step of PostgreSQL installation)
then click OK


Right click at Login Roles (1) and click New Login Role...


at Role name type 'dspace'


 and  click at Definition tab and type password for dspace user (please remember!! your password)


Then click at Role privileges tab and select checkbox as the picture below
(Inherits rights from parent roles / Superuser / Can create databases / Can create roles)
and click OK to finish create New Login Role...


Next, create New Database.. name


At Properties tab, textbox Name type 'dspace'  and has Owner name is 'dspace'


click at Definition tab and Encoding click select UTF-8 and Tablespace click select pg_default
and click OK


Try to double click at Databases name 'dspace '


It'll show details as the picture below 


Next step, try to create pgcrypto extension
by right click at Extensions (2) -> New Extension..


At Properties tab, Name type 'pgcrypto'


and Definition tab, at Scheme select public and Version select 1.2  then  click OK


It'll add new extensions name 'pgcrypto'


Go to next step, please do not close pgAdmin III program.

8. Create new folder name 'dspace' in  c:\  directory


9. Prepare to install dspace program by open windows command line 
and go to directory name

c:\dspace-6.0-src-release\dspace  


then  type command  mvn package


For this step, it might take a long time upon speed of your internet.
as showing an example, it took time about 28 minutes
program will continue to downloading file installation from the internet


After finish run command 'mvn package' ,  it'll show message 'BUILD SUCCESS' and Total time
of installation otherwise it might show 'BUILD FAILED'


Then change directory name to 
c:\dspace-6.0-src-release\dspace\target\dspace-installer  and then type command

ant fresh_install


Wait for few minutes (about 3-6 minutes), it'll show message 'BUILD SUCCESSFUL'


10. After finished install dspace program, then create administrator user for dspace system

by changing directory name to  c:\dspace\bin  then type command
dspace create-administrator


11. Typing the information as showing below for dspace program which consist of:
E-mail address / First name / Last name / Password / 
when finished fill your informations  press y to confirm 


12. Try to start Tomcat service for Web Server running by using command line
and typing  %CATALINA_HOME%\bin\startup.bat  and  press Enter


At first time for running, windows firewall will open popup windows asking allow through firewall
click at Allow access to allow


Wait until the last line of popup windows show message ' Server startup in ... '


Then go to browser and type url 
http://localhost:8080/jspui

if you see error message below 'HTTP Status 404' ,it mean that your setting are wrong
please go to next step  for solving it.
(After this step, you might see many steps that found an error but I'd like you to see
some of them and how to solve it )

Then go to directory  c:\dspace\webaspps   and copy folder name 'jspui' to directory
c:\apache-tomcat-7.0.69\webapps\ROOT


After finished copied then try to open website http://localhost:8080/jspui  again
but still found an error shown ' HTTP Status 500...'  , please go to next step


Next, try to move folder name 'jspui' out from ROOT folder


and rename the first ROOT directory to any name 
then rename 'jspui' folder to be ROOT instead


Then go back to web browser and open website again but still found problem
nothing appear, please go to next step


Go back to Windows command line panel and stop service of tomcat by typing command

%CATALINA_HOME%\bin\shutdown.bat


and start service again by typing command

%CATALINA_HOME%\bin\startup.bat


Then go back to web browser and open website again by just typing 
http://localhost:8080
 but still found problem as below by showing 'Internal System Error...'
 ,please go to next step


Go back to directory c:\dspace\webapps and copy all folder inside except 'jspui' folder


And paste all of them in folder name  c:\apache-tomcat-7.0.69\webapps


Next step, 
If you  launch command

%CATALINA_HOME%\bin\startup.bat 

and see this message -> .. java.lang.OutOfMemoryError ..
     or  
can't start web server after launch command

%CATALINA_HOME%\bin\startup.bat


You must create filename 'setenv.bat'

in directory of 'c:\apache-tomcat-7.0.69\bin'


Type the following message below inside setenv.bat (click here to download)
(For setting 'setenv.bat', please see more details at this reference site:
https://www.mkyong.com/tomcat/tomcat-javalangoutofmemoryerror-permgen-space/)


set JAVA_OPTS=-Dfile.encoding=UTF-8 -Xms128m -Xmx1024m -XX:PermSize=64m -XX:MaxPermSize=256m


Then go back to Windows command line screen and restart catalina by going to directory name
c:\apache-tomcat-7.0.69\bin  

and  typing command     catalina.bat restart


Next try to start tomcat service again by typing command

%CATALINA_HOME%\bin\startup.bat


Wait until the last line of popup windows show message ' Server startup in ... '


Then go back to web browser and typing url 

http://localhost:8080

Now, the installation complete with success.


Keyword: install dspace 6 on windows, install dspace 6 ,ติดตั้ง dspace, install dspace, institutional repository, ir, คลังข้อมูล, คลังสารสนเทศ, คลังสถาบัน, คลังเอกสาร, ติดตั้ง dspace 6, ติดตั้งดีเสปซ, dspace 6 on windows, การใช้งาน dspace เบื้องต้น, คู่มือการใช้ dspace, dspace คู่มือ, โปรแกรม dspace, การติดตั้ง dspace, การติดตั้ง dspace 6, dspace installation on windows, dspace installation on centosdspace installation step by step, dspace 6 installation, dspace 6.0 installation